How to Upload Videos to YouTube the Right Way (2026 Guide)
The most damaging mistake creators make is hitting Public the moment the upload bar reaches 100%. That single impulse means YouTube tests your video during its most critical window — the first hour — with incomplete metadata and a low-resolution copy still processing. The algorithm reads the early drop-offs as a negative quality signal, and your video is buried before it ever had a real chance.
This guide gives you the exact sequence and settings — from preparing your assets before you touch the upload button, through every tab inside YouTube Studio, to the precise moment you should schedule or publish. Every recommendation is based on analysis of 20+ creator workflows and millions of combined views, updated for YouTube’s 2026 algorithm changes including the new AI disclosure policies.
Whether you upload from desktop, phone, or need to post Shorts — the workflow starts here.
Before You Upload: What Must Be Ready
Uploading a video to YouTube demands preparation that starts long before you open a browser. Many creators begin the upload before their core assets are complete, which forces them into writing weak titles under time pressure or designing rushed thumbnails that fail to attract clicks. YouTube’s algorithm evaluates your video in its first hours based on initial audience response to these exact elements — so every asset must be locked and polished before you touch the upload button.
Lock Your Title Before You Hit Record
YouTube tests videos based on the first title viewers see and crawlers index. Finalize your title before you even start filming or editing. This ensures your video structure, spoken keywords, and opening hook match the promise your title makes.
When YouTube’s auto-caption system hears spoken keywords that match the title, your video’s relevance score rises. More importantly, this alignment prevents viewer disappointment — which keeps Audience Retention high and prevents the steep drop-off in the first 30 seconds that kills algorithmic distribution.
Design Your Thumbnail and Export It the Day Before
Official platform data confirms that 90% of top-performing videos use a custom-designed thumbnail — not an auto-generated frame grab. Don’t leave this critical task for upload day.
Technical specs: file size under 2MB, resolution 1280×720px (16:9 aspect ratio), saved as JPG for the best quality-to-size ratio (or PNG if it contains sharp text). Test readability at mobile size — that’s where the majority of clicks happen. For the complete technical breakdown including mobile safe zones, see the YouTube thumbnail size guide.
Write Your Description in a Notes App First
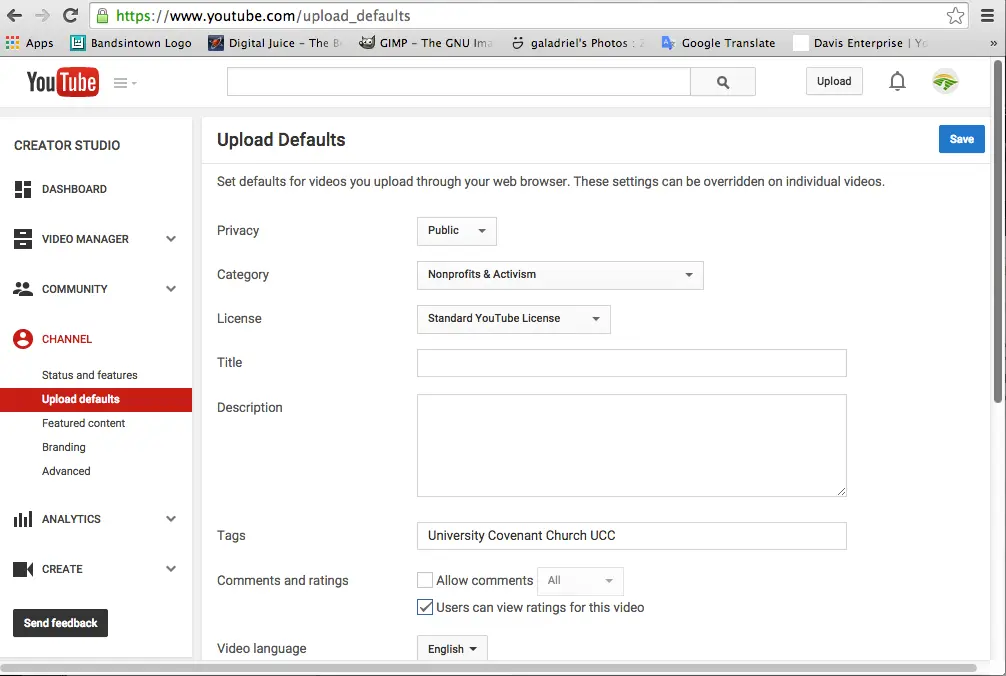
The description is not blank space for keyword stuffing — it’s an organizational and algorithmic tool that helps index your content accurately. Write it ahead of time in a separate document, and use YouTube Studio’s Upload Defaults feature to lock in your recurring links (social media, affiliate links, copyright notices). This saves roughly 80% of routine setup time and lets you focus on crafting the first two lines — the ones that appear in search results and directly influence click decisions.
Choose Your Playlist Before Publishing — Not After
Adding your video to a playlist before publishing is a strategic move that goes beyond visual organization. Algorithmically, YouTube classifies your video alongside its playlist siblings through Topic Clustering the moment it launches. This sends strong contextual signals that boost your chances of appearing as Suggested Videos in the sidebar — which multiplies Session Duration, the single most important metric for YouTube’s 2026 recommendation engine.
Pre-Upload Checklist:
Asset Status Title finalized (under 70 characters) ☐ Custom thumbnail designed and exported ☐ Description written in notes app ☐ Upload Defaults configured in Studio ☐ Target playlist selected ☐ Export format: MP4, H.264 ☐
 Caption: Pre-configuring your settings saves immense time and prevents uploading mistakes.
→ For the best export settings before uploading, see the complete YouTube upload settings guide.
Step-by-Step: How to Upload a Video to YouTube
The professional upload workflow happens exclusively through YouTube Studio on desktop. While the mobile app offers quick uploads, only the desktop interface gives you full control over every advanced setting, monetization tool, and pre-publish check.
Step 1 — Open YouTube Studio → Create → Upload
Sign in to your channel, click the camera icon with the + sign (Create) in the top-right corner, and select Upload videos from the dropdown. This opens the central upload window that manages your entire workflow.
Step 2 — Drag Your File (MP4, H.264)
Drag and drop your video file into the upload window, or browse to select it. For the fastest processing and best quality retention, your file must be exported as MP4 with H.264 video codec and AAC audio codec. These standard specs minimize visual artifacts when YouTube re-encodes your file into multiple resolutions (360p through 4K).
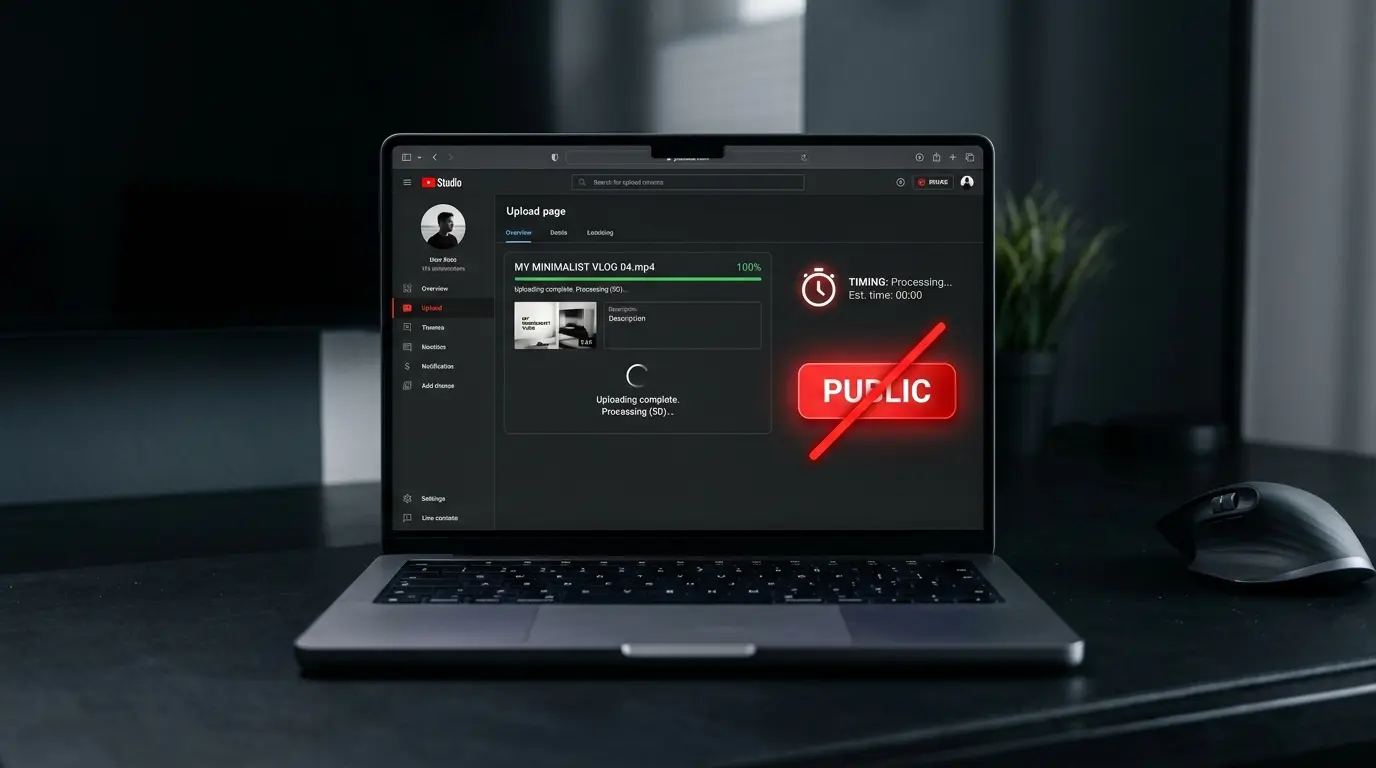
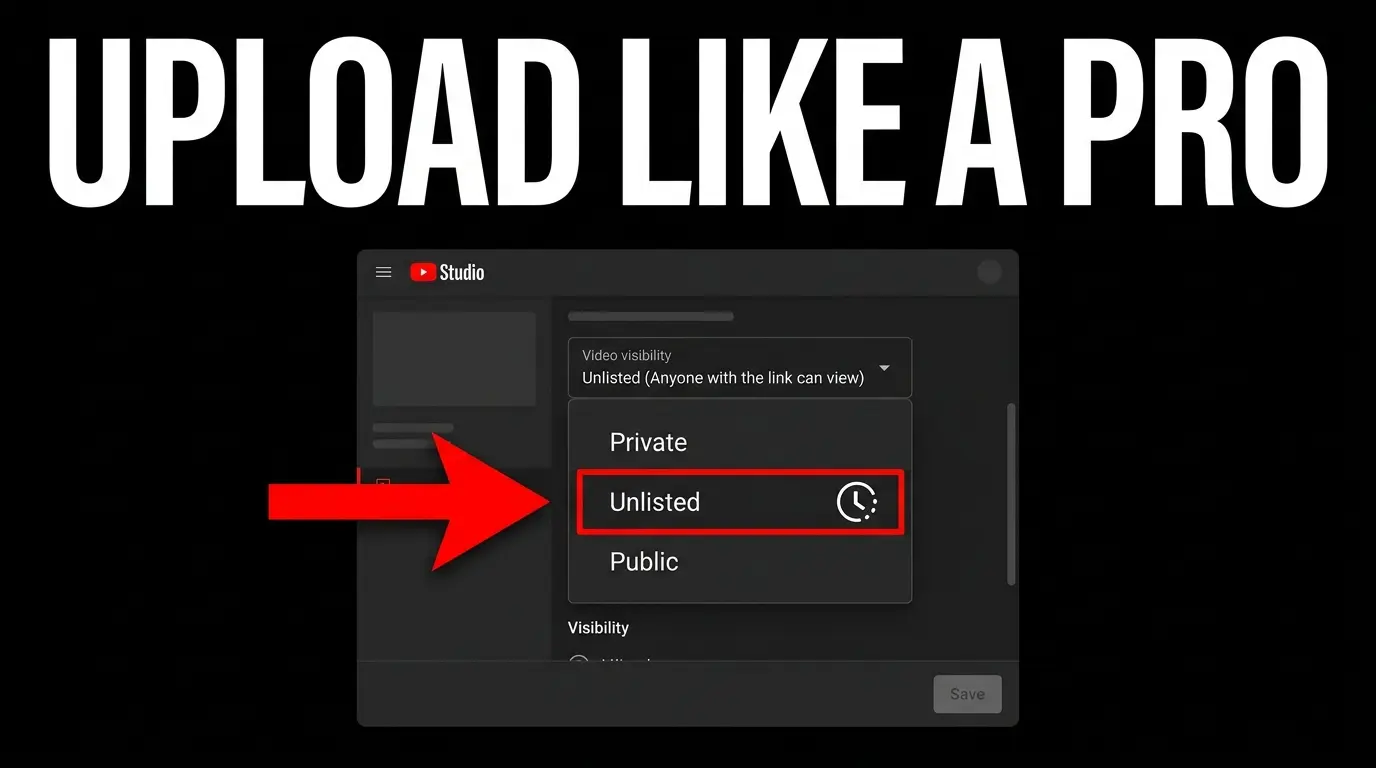
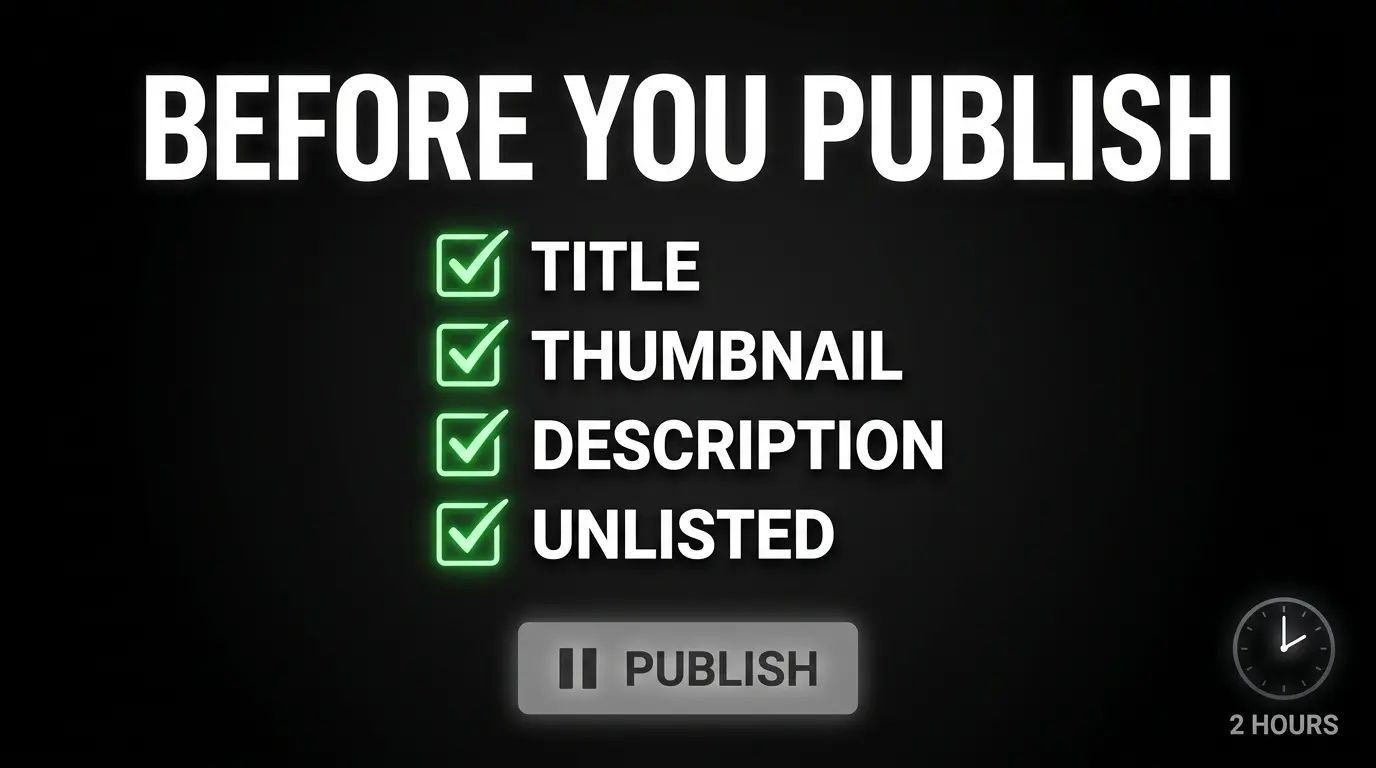
Step 3 — Set Visibility to Unlisted Immediately
The moment the upload progress bar appears, navigate directly to the final Visibility tab and set the video to Unlisted. Do not leave it on Public.
Publishing before processing completes means your first viewers watch a blurry SD version. They leave instantly, and the algorithm interprets that early abandonment as a fatal quality signal. Unlisted gives you a safety buffer.
Step 4 — Fill in Details (Details Tab)
Return to the first tab — Details. Paste your pre-written title, paste your complete description with chapter timestamps, upload your custom thumbnail, select your target playlist, and answer the audience targeting question (Made for Kids).
Step 5 — Complete Remaining Tabs
Move through the tabs methodically:
- Monetization — Enable ads and choose Dynamic Ad Slots if you’re in YPP
- Video Elements — Add your end screen and any cards
- Checks — Monitor copyright claims, ad suitability, and the 2026 AI-powered Community Guidelines pre-checks
- Visibility — Confirm Unlisted status
Step 6 — Wait at Least 2 Hours Before Publishing
After saving as Unlisted, wait a minimum of 2 hours. This critical window allows YouTube’s servers to fully process HD/4K versions and complete all copyright and ad suitability checks. If any claims appear, you have time to trim or mute the flagged section before it impacts organic reach. After 2 hours, schedule your publish time or go live.
 Caption: Always use the desktop Studio interface for full control over metadata and monetization.
→ For a detailed breakdown of every setting in each tab: YouTube upload settings — every option explained
→ Prefer uploading from your phone? See the mobile upload guide
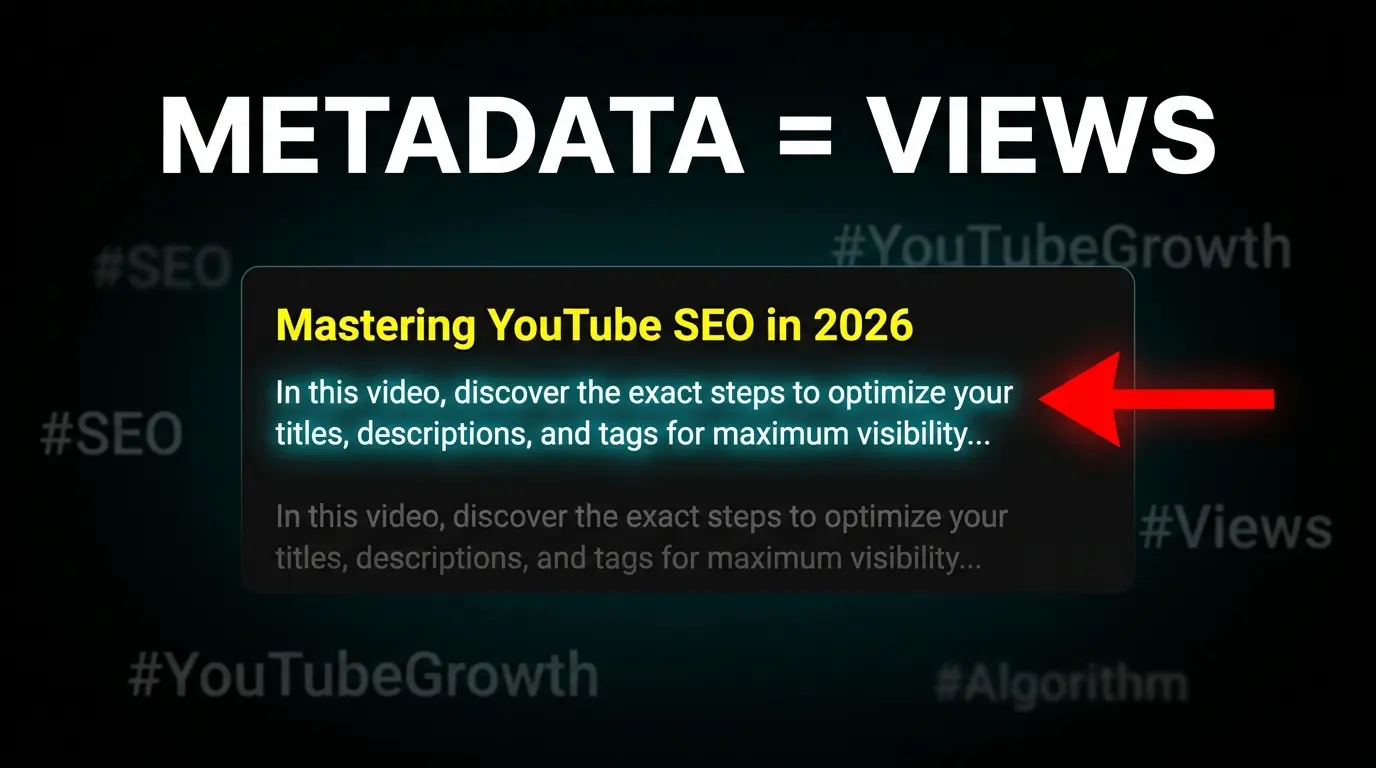
Title, Description, and Tags
Metadata is the language your video speaks to YouTube’s AI systems. In these few lines, the algorithm makes its initial decision about which audience segment to target — and the viewer makes their final decision to click or scroll.
Two Types of Videos — Know Yours First
Before writing any metadata, you need to make a strategic distinction between two fundamentally different video types, because each demands a completely different approach:
Searchable content is designed to answer specific queries — tutorials, reviews, how-to guides. This type relies heavily on targeted keywords. The title and description must contain the keyword directly and clearly to rank in YouTube and Google search results.
Algorithm-driven content includes entertainment, vlogs, and storytelling. This type doesn’t target specific keywords — it targets clicks from the Homepage (Browse features) and Suggested Videos sidebar. The title here must create emotional curiosity, pose a question, or present a visual paradox that’s impossible to ignore.
Title: Under 70 Characters for the Right Reasons
Title length isn’t an aesthetic preference — it’s a technical requirement that directly impacts performance metrics. Keep your title under 70 characters. Anything beyond this limit gets truncated with ”…” on mobile screens. Since mobile accounts for the vast majority of video consumption, truncated titles fail to communicate the idea and cause steep CTR drops.
For searchable videos: place the primary keyword in the first 3 words. YouTube and Google’s indexing algorithms assign greater semantic weight to opening words, ensuring your video is evaluated as highly relevant to the search query.
Description: The First 150 Characters Matter Most
The common mistake is treating the description as an unstructured essay. Search engines weigh its parts differently. The first 150 characters (roughly the first two lines) carry the most weight — they appear as the text snippet in YouTube and Google search results directly below the title. The first line must include your primary keyword naturally and summarize the direct value the viewer will receive.
To streamline your workflow, using Upload Defaults in YouTube Studio is essential. Set up a fixed template containing your social links, equipment info, copyright notices, and affiliate links. This saves 80% of routine description writing time per video.
Tags and Hashtags: Don’t Spend More Than a Minute
With AI models now understanding spoken content and visually recognizing elements inside videos, the historical role of tags has diminished significantly. YouTube officially states that tags primarily help correct common spelling errors in search queries. Don’t spend more than one minute here — add 5 to 10 compound phrases that accurately describe your content.
For hashtags: include a maximum of 3 specialized hashtags at the bottom of your description. YouTube automatically displays them above your video title to help users interested in that topic find you.
 Caption: The critical first 150 characters of your description act as your search engine snippet.
Thumbnail and Playlists
YouTube’s initial algorithmic distribution depends almost entirely on how the first wave of viewers interacts with your visual display (thumbnail) and organizational framework (playlists).
Thumbnail: The Difference Between a Click and a Scroll
Your thumbnail is your video’s billboard in a space competing with millions of other pieces of content. Official platform stats confirm that over 90% of top-performing videos use custom-designed thumbnails — never the auto-generated frames.
In 2026, YouTube introduced Test & Compare directly inside YouTube Studio. This feature lets you upload up to 3 completely different thumbnails for the same video, and the system A/B tests them automatically on equal audience segments. To maximize effectiveness, the 3 images must test fundamentally different concepts or visual angles — not slight color variations of the same design. The algorithm doesn’t just measure CTR to pick a winner — it measures Watch-time share, ensuring the winning thumbnail doesn’t rely on clickbait but on matching viewer expectations.
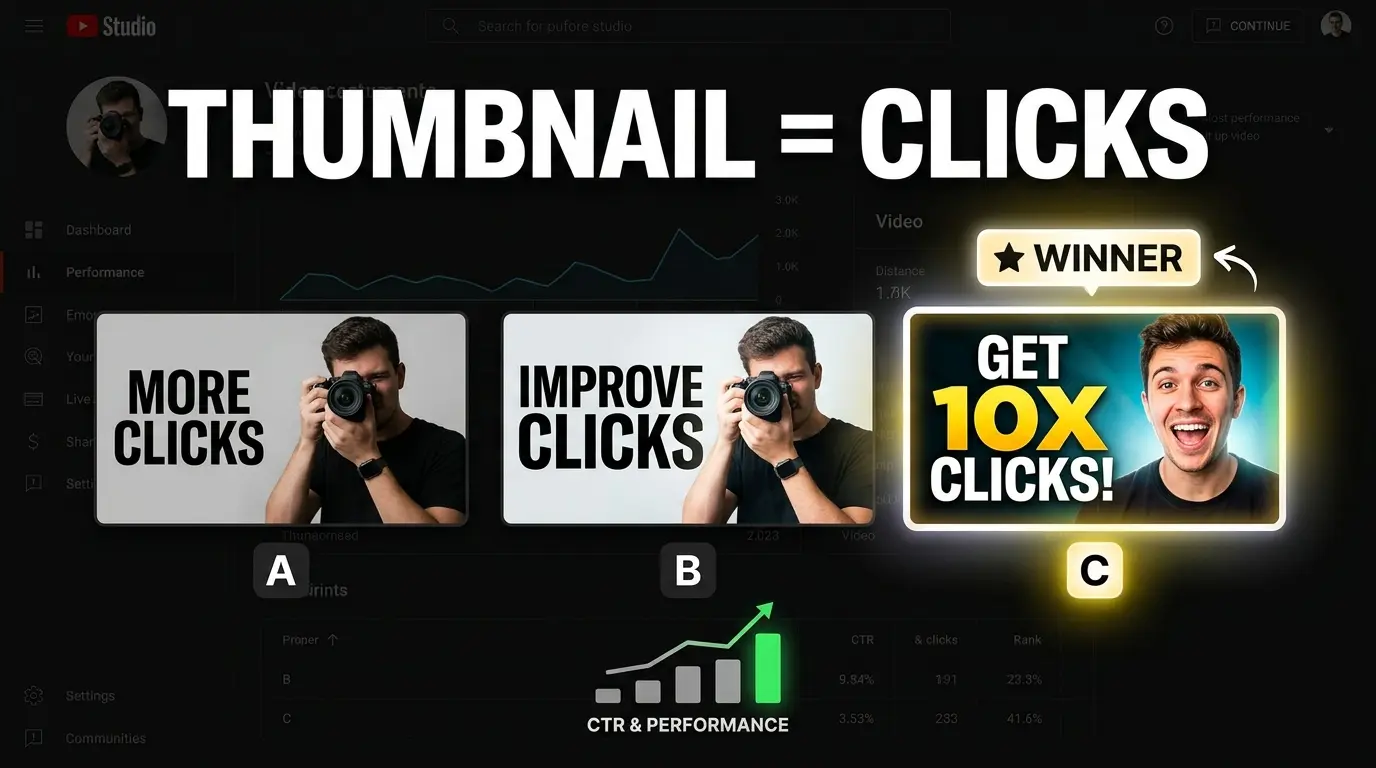
For a deep dive into thumbnail testing methodology, see the YouTube thumbnail A/B testing guide. For proven design techniques that boost click-through rates, read our high CTR thumbnails guide.
Playlist: Add It Before Publishing — Not After
Adding a video to a playlist before publishing is an advanced architectural tactic. When a video launches already belonging to a topically-built playlist, YouTube classifies it with its siblings in the first ranking window. This sends an immediate and powerful Topical Context signal to the algorithm, boosting its chances of appearing in Suggested Videos recommendations for similar content.
Golden rule for playlists: avoid stuffing hundreds of random videos into a single list. The ideal playlist contains no more than 10 precisely sequenced videos forming a logical journey for the viewer (like a mini-course or a connected series). Tight playlist organization raises the probability of binge-watching — the behavior YouTube’s recommendation algorithm watches closely to multiply a channel’s organic reach.
Essential Settings You Must Not Skip
Behind YouTube Studio’s simplified upload interface lies a series of technical and legal settings that determine your video’s fate, its platform compliance, and its monetization eligibility. Ignoring these can expose your channel to risks that go far beyond lower views — including legal penalties and account suspension.
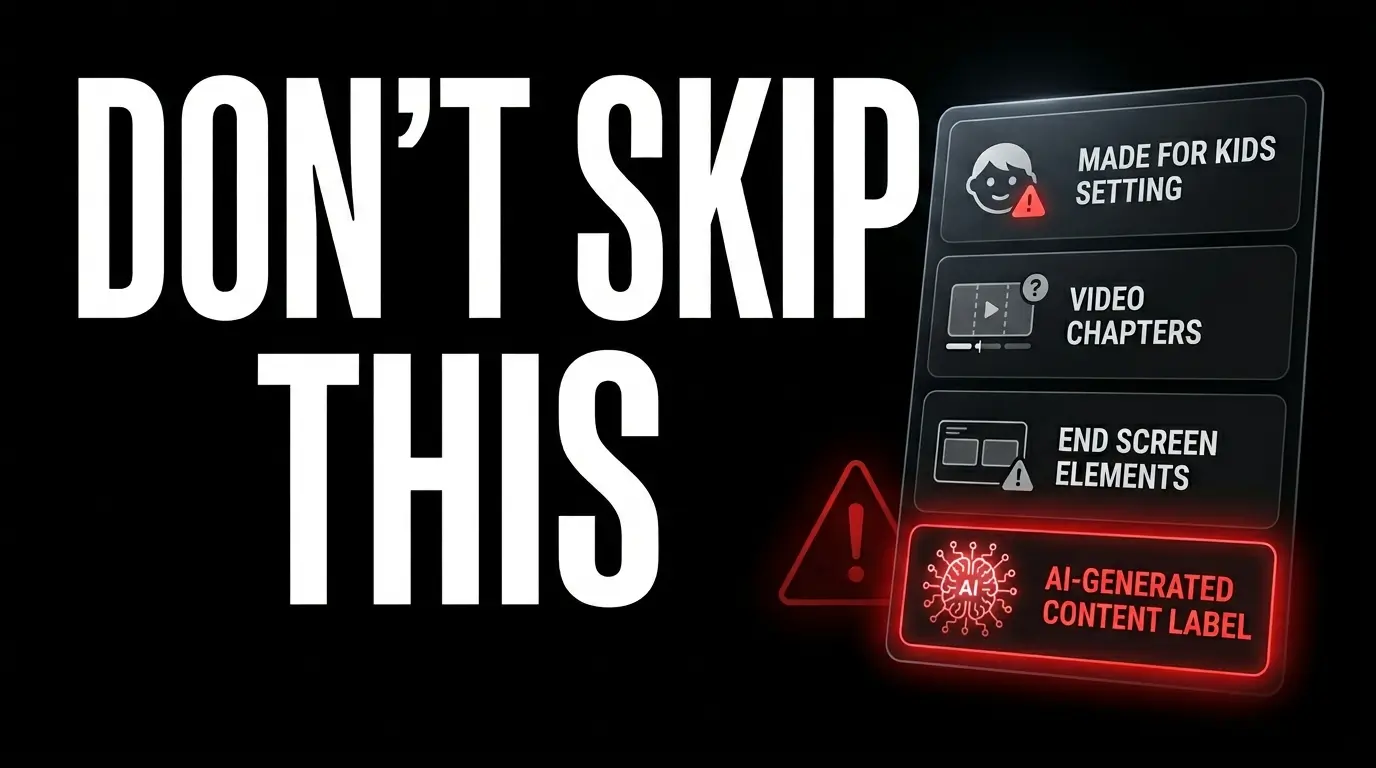
Made for Kids: A Legal Question, Not a Preference
Designating content as Made for Kids isn’t an optional organizational filter — it’s a strict legal obligation under the Children’s Online Privacy Protection Act (COPPA). The FTC has imposed massive fines for privacy violations in the past, forcing YouTube to transfer full legal responsibility to creators.
To simplify this decision, apply the Peppa Pig vs Marvel rule: if your content targets children as the primary audience through classic cartoon characters, simplified children’s songs, or early-age educational games — it’s Made for Kids. If it uses superhero characters in contexts with complex themes, violence, or satirical dialogue aimed at teens and adults — it’s not. Wrong answers here don’t just limit algorithmic distribution — they disable comments and notifications, restrict personalized ads (cutting revenue by up to 80%), and can lead to FTC legal action.
Manual Chapters: Don’t Leave Them to AI
Dividing long videos into timed Chapters gives viewers a smooth navigation experience and lets them jump directly to the information they need — reducing bounce rates and increasing overall retention. More importantly, chapter titles get indexed as Key Moments in Google Search, opening doors to massive search traffic from outside YouTube.
Although YouTube offers AI-powered automatic chapters, don’t leave this entirely to automated systems. Add chapters manually in the description with timestamps followed by keyword-targeted chapter names (example: 0:00 Introduction, 2:30 Step-by-step walkthrough). The only technical requirements: the first chapter must start at exactly 0:00, the video needs at least 3 chapters, and each chapter must be at least 10 seconds long.
End Screen: One Element, 5-10 Seconds
End Screens are the most powerful tool for keeping viewers inside YouTube’s ecosystem — and a strong signal to the algorithm that your content extends session time. The common strategic mistake is cramming 4 videos and a subscribe button into the last 20 seconds, creating Decision Fatigue that causes viewers to leave without clicking anything.
The data-proven strategy: use one element only — a direct visual and verbal cue pointing viewers to the “next video” that continues the current idea. Limit the end screen duration to the last 5-10 seconds instead of 20, ensuring it doesn’t cover actual content. Videos (Views & Session Time) raise your channel’s algorithmic value far more powerfully than collecting silent subscribers who never engage again.
Altered Content: When to Choose Yes
Starting with YouTube’s 2026 updates and the explosion of generative AI tools, YouTube now requires mandatory disclosure of Altered Content. A checkbox in the Details tab asks whether your video contains substantially altered material.
Choose Yes exclusively when your video contains manipulation that could mislead viewers into believing it’s real:
- Deepfakes that swap a real person’s face
- Synthetic voice imitating a known individual
- Manipulated footage of real events (like editing a city to appear hit by a disaster that never happened)
Importantly, choosing Yes and showing the disclosure label is not a punishment — YouTube officially confirms it does not reduce organic reach or affect monetization eligibility. However, failing to disclose risks video deletion and channel suspension from YPP. Minor cosmetic edits (beauty filters, background blur, obvious fantasy animations) are fully exempt and require no disclosure.
→ For the complete settings breakdown tab by tab: YouTube upload settings — every option explained
Timing and Scheduling
Timing is the dynamic element connecting high-quality content to an audience that’s ready to engage. Publishing an exceptional video at a dead hour when your followers are offline can bury it permanently in the algorithm’s depths — and no amount of perfect settings will save it.
The First Hour After Publishing: Why It Makes or Breaks You
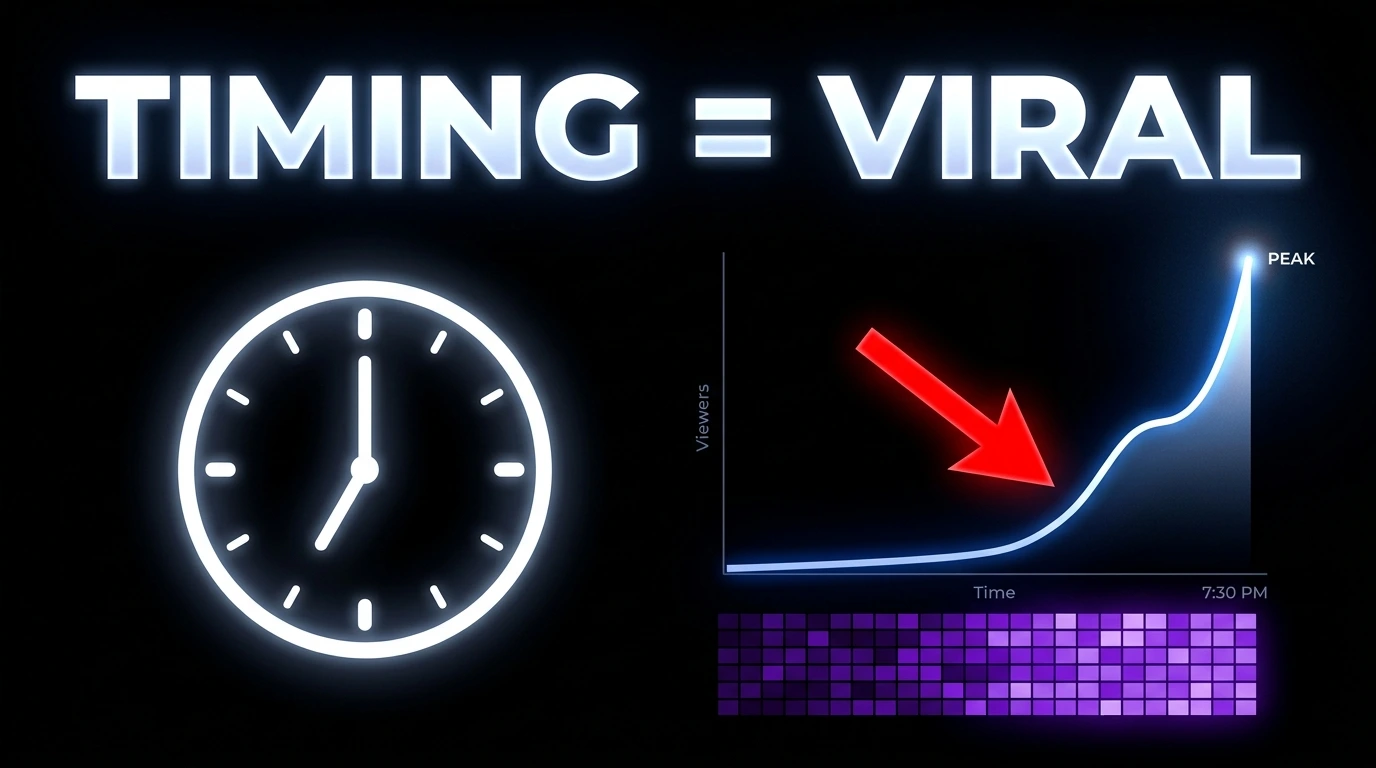
YouTube’s handling of new videos relies on a concept called Velocity — initial momentum. In the first hour after publishing, YouTube places your video in an algorithmic testing zone, showing it to a small but highly active sample of your core audience (subscribers and returning viewers). The system closely monitors CTR in this narrow window.
Any deep engagement during this window — sustained viewing of a high percentage of the video, a Like, a genuine comment, or link sharing — acts as an immediate Satisfaction Signal. If the signals are positive and your core audience appears satisfied, the algorithm pushes distribution to Browse features on the homepage for a broader audience with similar interests — creating the viral effect you’re after.
How to Find Your Best Publishing Time from Analytics
There’s no universal magic timing rule — what works for a gaming channel may fail completely for a financial news channel. However, YouTube Analytics provides the precise map.
Navigate to YouTube Studio → Audience tab to find a color-coded heat map showing exactly when your regular viewers are online (When your viewers are on YouTube).
The tactical strategy: don’t publish at peak time — schedule your video 1-2 hours before your channel’s peak begins. This gap lets the algorithm index the video, test it on the early segment, and build the momentum needed to place it at the top of suggestions when maximum viewer traffic begins.
Schedule vs Instant Publish
Scheduled publishing strategically outperforms the instant publish button every time. Scheduling lets you set a personal reminder to be actively present for replying to comments in the first hour after launch — a behavior that raises initial engagement and encourages viewers to return for discussion.
Beyond that, consistency in your publish day and time matters far more than perfecting a single video then disappearing for months. YouTube’s updated algorithm rewards channels that give viewers a fixed schedule (Upload Consistency) they can build expectations around for returning to the platform regularly.
Choose the Right Upload Method for You
Upload settings and tactics differ fundamentally based on your device and content type. To avoid technical frustration and ensure every standard mentioned above is applied correctly, follow the guide that matches your current situation:
🖥️ Desktop creators: The desktop interface gives you complete control over Test & Compare thumbnails, complex end screen programming, and granular monetization settings. → Complete upload settings guide
📱 Phone uploaders: The YouTube mobile app offers a comfortable quick upload experience, but lacks some professional features — requiring supplementary steps to set advanced metadata and interactive video elements. → How to upload from phone — step by step
▶️ Shorts creators: The Shorts algorithm operates on entirely separate criteria — relying almost completely on rapid retention metrics (swipe-through rate) and loops, without requiring lengthy metadata or end cards. → YouTube Shorts upload guide
🎮 Gaming channel owners: Gaming content requires special programmatic categories and mandatory addition of official game titles to ensure accurate classification within specialized player communities. → Gaming channel upload guide
Final Checklist: Before You Hit Publish
Sustained growth on YouTube in 2026 isn’t luck — it’s the inevitable result of following a systematic protocol every time you interact with YouTube Studio’s upload interface. The two most critical points to internalize:
First, lock your title under 70 characters and make it compelling for either search intent or viewer curiosity — before you even start filming — to ensure your content matches the promise.
Second, always set visibility to Unlisted to secure a silent 2-hour processing window that lets the algorithm process HD quality and run all security and commercial checks without burning your video’s critical first hour.
Pre-Publish Checklist:
- ☐ Title locked and under 70 characters
- ☐ Custom thumbnail uploaded
- ☐ Description edited (first 150 chars = keyword + value)
- ☐ Playlist selected
- ☐ Made for Kids: answered honestly
- ☐ Chapters: added manually in description
- ☐ End Screen: added (one video, not subscribe)
- ☐ Altered Content: answered if applicable
- ☐ Visibility: Unlisted → wait 2 hours → Public or Schedule
Keep building your channel:
- 🔧 Every YouTube upload setting explained — tab by tab
- 📱 Upload from phone: the right way
- ▶️ YouTube Shorts: settings and secrets for reach
- 🎮 Gaming channel upload guide
- 📐 YouTube thumbnail size & specs
- 🔥 High CTR thumbnails: 10 proven tips
- 🧪 A/B test your thumbnails the right way
- 🚀 60 thumbnail tips for 2026
![Your First 10 YouTube Videos: What to Post [2026]](/images/growth/first-youtube-videos/first-videos-plan.webp)
![How Long Does It Take to Get 1000 YouTube Subscribers? [2026 Data]](/images/growth/how-long-to-get-1000-subscribers/1000-subscribers.webp)